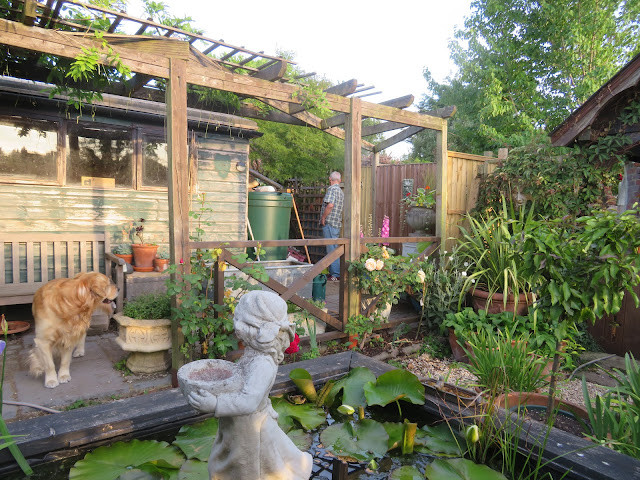
Thursday, 1 May 2025

SO THE WHEELS KEEP SPINNING. . . .

Now having put up the privacy stained glass screen, I looked to the other end of that area. The little grey cells working overtime.


So I looked at the right hand side of this photo, pasted the blue shed in the centre to the piece of black trellis by the water butt. At first I thought that we could do a similar screen of stained glass where this trellis was.

But I went and had a good look around the area and changed my mind. Just out of shot is my doll studio ( a nice solid cabin ) , and when we'd put it up, we'd taken down a gazebo built by the previous owners.

However we had left the side post and rail along with a lower handrail with trellis because we'd been growing Honeysuckle and Jasmine on more trellis we'd added at the side. This Paul's cut back last year to allow the plant to regrow and allow us to get rid of the dead wood.


You can see  the trellis and behind that the side of the cabin that was unstained. So when I went looking to see what would be the best thing to do with this space, I realised that the cabin was a good 15 inches or so away from the trellis, this was to allow for the roof overhang. 

So I discussed with Paul about removing the trellis and the plants and the original gazebo side, which was now actually rotting in placed and the post was loose and covered in ivy.

This is with the trellis removed along with the post and plants. In the foreground is the trellis rail from the original gazebo.

Having left Paul to take it down, I then came along and said about moving everything out the way !! 

I also said that maybe we should remove the last piece of trellis in black at the front and reduce the top back to the last post, since it was at present floating in midair and would need to be removed or extended up to the cabin.


We replaced some thin trellis with the trellis we'd taken from the front to this space above the side fence, you can see our neighbours back wall at the side with a bench in front and they could see through to us sitting under our gazebo. 


This shows that extra space opened up by removing the old plants and trellis.

We decided to add a piece of stained glass that Paul made years ago . 


This is the view from between the cabin and shed showing the gazebo area.


It give's a little privacy. But our neighbour also mentioned about being able to see into each others garden, so we will add some boarding either side to complete the job.


Now looking at this post you would think it had been put in by  a drunk ! However once upon a time it was lovely and straight and covered by Jasmine and Honeysuckle.
We realised when we came to change this section that the post was at a really bad angle. The only thing we can thin of is that when we had our patio laid, they pushed the metpost it sit in over so they didn't have to cut the paving slab at that point!
So this had to be removed and a new post put in in a different way to straighten it up as much as it could be.
We also painted the side of the cabin to match the front.


Here you can see the colour on the side of the cabin along with the water butt than we have had for a few years and turns out is a good match, so that waiting to be set up. 


We moved our tin bath/trough from the front garden, where it wasn't achieving what we wanted. We added Ferns and Hosta's to it and placed on the raised wall with some other Hosta's in pots around it.


For the moment my little potting shed , made from an old dog kennel, is sitting in the corner until it can go further down the garden.


But this left a big empty area on the wall above. So I thought it would be a great area for an Auricula theatre.


So we did not have anything suitable and if we had to build one , the wood would have cost a fair bit, Paul suggested looking on Ebay market place for something suitable and I found this being sold for £20 in a village only fifteen minutes away, but the lady told me someone was coming to collect it but if they didn't turn up, she'd let me know. Well they did not turn up and we did, so it was ours.


So two coats of black stain later it's now up on the wall filling the empty space.


The post now much straighter.


Some Auricula's on the theatre. Although some have had a rough winter and need repotting.


from the side gate.


We added some boarding either side of the stained glass to give the last piece of privacy , although the dog can still see movement down the tiny crack between the shed on the left and the post, so barks when he notices movement !


Boarding now painted and just need to either paint the board above or cut it off.


Now nice and open, giving a feeling of space .


So for this, although it is more untidy that it was  to. . . 


this ! Much better ! No mess and space to move about between the gazebo and the shed.


Saturday, 19 April 2025

SCREENING THE VIEW!

 A garden is always evolving. Well ours is. Things will have been in place for a few years or much longer but then those made from wood will start to rot or break and it give's you the choice, to either just replace with the same or do a total or part redesign.

That's what happened with a screen of trellis and a plant at the side of the house and back gate.


The trellis was put in place to give us privacy from people walking up to our neighbours front door. We live on a hill and our neighbour on this side is higher than us. We jd planted an akebia against the trellis and it grew like a wild thing soon covering the trellis , up the side of the extension roof and over the wooden gazebo planks. We would have to cut it back each year to stop it filling the guttering and roof.

Now since we'd put the new railing up between the cloisters and the pond garden, the three pieces of stained glass I'd used to semi hide the water butt by the workshop.


These two, the third was below in the middle but removed when the new railings went in. So I suggested that we could use these three pieces of stained glass along with some new trellis to replace the old trellis by the side of the house.


Clearing the trellis and plant 


The root ! Took a while to dig out.


Please excuse the mess, this was made while emptying the space that's now a potting shed. But some how it's the only photo I seems to have taken which shows the opening with the trellis still up both sides. 

Now what happened was while Paul was sorting out the removal of the old trellis and plant on the left of the photo, I was sitting under the gazebo looking at the complete area. On the right was another trellised section but this had two stained glass windows in, which lion head style detail, under was a piece of diamond shaped trellis used from elsewhere at the time and a piece of extra large trellis to fill the remaining gap.


Now when the area by the gate was opened up, it remined me just how nice it used to be with it all open. We only closed it up on the other side of this part, where the lion head glass windows were in order to hide the side of our neighbours large yellow van and also to give us privacy because we, at that time , had a small low garden shed for the garden tools, lawn mower etc. 

But now we'd moved that shed and replaced it with a much taller one that filled the open area from before. So I said to Paul about removing the windows and trellis aon the right and opening up that space. He didn't say no . . . . 


So the other side was taken down. Naturally it had been used to store things that were waiting to be used or had been left.


A pile of bricks, waiting to be used for the paving up to the dolls studio, pots that had been used for plants and then those plants put into the garden. The bar b que which will now need a new home ! 


He framed the two pieces of stained glass from down the end.


Wished I could have kept them somewhere inside. Anyway that could not happen but now I had another two pieces of stained glass I could work with, I suggested to Paul about using one of the lion head pieces with the three from the end.


Did use them this way ? or 


I settled on this way, with the smaller window above the lion's head one, which turned out to be a good choice. We intended to use the other lion's head window in a small area of trellis right over the far side of the section, where it was possible to see into ours and our neighbours garden.


We could not just put in the windows and leave a small open gap between the original post and the side of the house. So we fitted another smaller post partway along and used this area for the glass.


Then the other frame of two panels was fitted . We intended at this point to fill the space on the left with either a close fitting small trellis or  fencing.


The white window was stripped and everything stained black. A leftover decking board , which had been used under the diamond trellis on the other side was cut down to male two boards to fill the gap below the glass.


So we looked at our wood, trellis etc to find something to fill the area on the left which would finish the screen and complete the privacy. Nothing seemed to work and the fencing strips we had were one piece short to fill the gap !  It was now after six pm , so time to finish for the day

But my little grey cells had been whirling and so I asked Paul if that gap was wide enough to take the other lion head window? He said yes. So I said lets try it there and use the fencing boards to fill beneath and since the space would be smaller we should have enough? 

Next day, he stripped the other lions head widow, fitted a bar and


Fitted it in place. Now just the lower panelling to be made up and fitted.


So a piece of glass needed to fill that small space on the bottom right and then a coat of black stain all over.


So some stain applied.


Now just a few finishing touches, then it's all done. Mm wonder if we could paint that water butt black ?  . . . .


Friday, 11 April 2025

MAKING OF A POTTING SHED !

 So a few years back, we made a shed/plant wintering area at the end of the garden beside / near the greenhouse. We used the existing back fence panel added another coming off that and then from that, turning to form the u shape added a wall made of insulating poly clear panels, the used the same to form the final side and door.

In this we stored all out any various sized terracotta etc plant pots and in the winter months the plants that needed protecting from the cold and winter rain.

During our usual late winter chats about the garden, we decided that, since we now had most of the bigger pots in use in the garden all year round and didn't need as much plant over winter storage, that we would turn this area into a potting shed.


So starting to put what's needed in and decided what's not. The slim shelving unit replaced a bigger deeper one which would have filled the space just a little too much. But naturally this slim unit was in use down by the house in the garden tool shed, so that meant taking everything out and off this one and changing that shed's layout to put the bigger one in.


Now the smaller terracotta pots are able to come out and be easily used, instead of away in boxes.


Now the plant stand for the cut and come again lettuce ,Paul made several years back from old pieces of wood and decking , will be used as the planting table. We just need to find some wood to make a top for the left hand side so the green potting tray and sit on and a smaller piece that the white box can sit on at the other end to hold either pearlite or grit. The large black plastic trough will stay roughly where it is , to hold the compost.


Paul fixed a length of wood across the fence panel to hang some tools from and also the metal cubby hole track I bought a good five years ago for just this purpose of potting. It's so nice to finally see it being used !.

You can see there is plenty of light inside but we will add a solar powered light at some stage.


Paul found two pieces of the old solid wood kitchen worktop, which are now being used for the top here. They do have a slight curve to them having been used elsewhere out in the garden but hopefully they will straighten up more over time and once there is some weight on them.


There is already a small amount of grit ready in the box under the workbench. Now a lovely space for Paul to do his potting up and potting on.

Now just need to make sure 'stuff' doesn't start getting left inside.


View of the doorway. Which needs a bolt to help keep it shut in windy weather.


A look into the greenhouse.


n


Unfortunately, he was sent the wrong parafine for the heater a couple of months back, which covered everything in soot! Although he managed to wash quite a bit off , the whole greenhouse will need a good clean once the summer gets here and all the plants are out.


We replaced one of the back fence panel's that had been broken during one of the winter storms. So that's all nice and secure now.